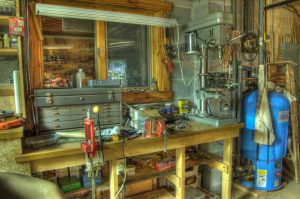
 If you are a passionate shooter, you must know that reloading ammunition is a much more cost-effective option instead of buying factory loaded ammo.
That said, you need to make sure you are reloading your cartridges in the right manner without compromising safety and performance.
Using hand presses would save you money and space, but there will be times when you would need a larger setup, here’s where the workbenches come in.
A perfectly designed workbench could do wonders regarding productivity by giving you ample space to place your reloading press and all other necessary equipment.
Knowing how to mount a reloading press to a bench is one of the aspects that are covered under reloading 101. This article is intended to walk you through the process thoroughly.
Take precise measurements of the bench before you mount the press. Make sure that there is enough room for free movement of your feet and elbow while you are using the press.
You should have at least 8 to 10 inches of space around your press, meaning there should be a minimum of 8 to 10 inches of space on either side and also behind the press. It allows you to keep all your reloading paraphernalia within a hand’s reach.
After pinpointing a suitable spot on the bench to place the press, you must put it there and clamp it in position. Pull and push the press handle a couple of times to see if there’s any inhibition to the handle’s smooth movement, if the handle is not moving freely then you should stop immediately and check the reason.
Hesitant press handle movement is one of the culprits behind accidental primer explosions, so always be 100% certain that your press handle is moving without any interference.
You can also consider moving the press a bit away from the edge so that you could get more space for easy handle movement. However, you must also keep in mind that moving the press inwards would take up more space on the table and reduce the storage capacity for your other tools.
Take a pencil or a marker and mark the places on the bench where you would be drilling in the lag bolts through the mounting holes to fasten the press to the bench securely.
Put the press on the bench and carefully mark the mounting holes on it. While you are at it, you must ensure that the press remains sturdy and makes not even the slightest movement by clamping it tightly to the bench.
Once you are done marking, unscrew the clamps and take off the press. Use a power drill to make holes in the spot you have marked.
The holes must be large enough to fit the lag bolts that would clamp the press to the bench. The size needs to be perfect so that the press attaches firmly to the bench.
Simply put the press on the bench so that its mounting holes match the holes you have just drilled. The mounting holes need to be precisely aligned with the bench holes.
Take some bolts, put a flat washer on each them and push them through the mounting holes and the holes on the bench. If you have difficulties to get them through, try tapping them with a hammer.
After successfully getting the bolts through the bench, use fender washer, lock washer and hex nut on the end of the bolts that come out on the bottom half of the bench. This would stabilize the press on the bench and reduce the risk of an accident in the future.
Dismiss the clamps, and you are all set for doing some reloading on your new workstation.
Reloading is not only a matter of shooting economy; it has evolved into a form of art. Learning to mount your press to a workbench is one of the initial but most important steps you would be taking in mastering the art of reloading. Hope our article has been helpful in easing up the matter for you.

Joseph Fox writes on a variety of topics ranging from reloading ammunition to gun cleaning. He has been featured on various publications like thetruthaboutguns, Sofrep & many more. Joseph is also the founder of Gunloading, where he reviews different types of reloading & firearm products available on the market.
Gunloading.com is a participant in the Amazon Associates Program, an affiliate advertising program designed to provide a means for us to earn fees by linking to Amazon.com and affiliated sites.
About Us | Contact Us | Privacy Policy | Amazon Affiliate Disclosure
Copyright © 2022 Gunloading.com All Rights Reserved