
 We get it: the option of having your rifle scope mounted professionally seems quite tempting, as it apparently leaves no room for error.
You might, however, find that to be untrue at times–especially if you get it done for free.
If you’re in a hurry, then sure, you can opt to have it professionally mounted. However, learning how to mount your ownrifle scope on your own has its benefits.
Mounting your scope yourself allows you to enjoy greater precision, as you’re in charge of fitting it exactly to your measurements.
And as you already know, a properly mounted rifle scope can spell the difference between an accurate shot and a bad one. So here’s the step-by-step guide on mounting your rifle scope.
Before we can get started, you need to get yourself the following items. You can’t mount your scope without these, so read carefully!
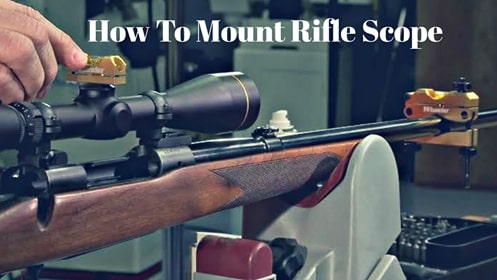
Have everything you need? Then let’s get started on mounting your rifle scope!
The first thing you need to do is: prepping! Your rifle won’t be able to accept the mounting of the base unless residue, grease, and dirt have been dealt with. If there’s any sort of residue, it will be difficult to have the scope base be seated fully onto the rifle.
You must degrease each separate screw hole; you can access them by removing the plug screws placed along the receiver’s top. This is where your screwdriver will be coming in handy.
Before you can install the scope, you’ll have to secure your gun, either with the help of a lead sled or a gun vise. Whatever you use, the point is to stabilize the gun while you work on it.
Add a little bit of gun oil on the contact surfaces before you attach the scope base to the rifle. This helps prevent rust between the scope base and the receiver.
If using a picatinny rail: layer a light oil coating on the rail’s underside before mounting. Don’t get oil on the mounting screws!
Now torque the screws using the torque wrench. You should get a Vortex or Wheeler torque wrench as they are ideal for gunsmithing.
If using a combination of base/ring: Do the same as above, but mount only the lower half of the base/ring combo. This allows you to set your reference level on the horizontal part of your bases.
With the scope base securely fastened, now you’ll be mounting the scope rings. Once you’ve disassembled the additional scope ring parts and small screws, organize and put them away carefully, so you don’t lose anything.
Start by mounting the bottom of the rings, then keep test-fitting as you move on to the top rings. Once your rifle has been secured, place the scope in the bottom of the scope rings.
You know how, sometimes, when you’re looking through your rifle optic, a smudged black ring appears? Well, setting the eye relief properly prevents that from happening.
Pick up your rifle and gently shoulder it (not unlike how you’d be doing so in the field). Rest your cheek comfortably on the rifle stock’s comb, keeping your eyes closed. This is the best way to find a natural rifle placement.
Now, open your eyes, and allow the correct eye relief to appear. Adjust the scope accordingly, moving it forwards or backward slightly. Do this until the black ring disappears.
Now it’s time to break out that leveling kit. Leveling is the process of ensuring that the scope and the action of your gun are on the same horizontal plane. Unless this process is perfected, you might end up aiming slightly to the right or to the left without knowing it.
To start, secure the rifle again. Now, position your level on the center turret. Keep adjusting your scope until the bore and reticle are parallel and perpendicular. Once the scope is level, you have to tighten the screws of the scope rings. Each screw must be tightened gently, and done so in a criss-cross pattern (like how the lug nuts of a tire are tightened).
The ocular focus must be properly dialed in before you can sight in your scope. This affords you a clear and crisp image of the scope’s reticle. Without proper reticle adjustment, your eye will have to strain harder and, as a result, suffer fatigue.
Adjust the rifle scope’s diopter by aiming your rifle (unloaded!) in the direction of any high-contrast background. Once you have a clear reticle picture, now you can start using your scope setup.
And that’s it! You’re done.
Now that you know how to mount rifle scope, a whole new world of possibilities will be opening up for you. If you fail the first time (or first few times), don’t lose heart! You can always come back to this guide, or look up some videos on YouTube.
Good luck, and we wish you a fruitful hunting season!